.

Showing posts with label Rain Garden. Show all posts

Gardening on the Radio

I was on the radio yesterday to talk about gardening on Spotlight on Spring Hill (WAKM 950 AM) and had several fall gardening topics prepared to share. Then the first guest to talk, our City Codes Inspector, began mentioning some upcoming projects and I nearly got completely sidetracked. You see I meant to talk about leaves, not to burn them, not to waste them, but to use them in your compost or as mulch. I had seen a Craigslist ad that completely annoyed me last week and thought the radio would be a great opportunity to get out the message. The ad actually said "Free leaves, if you don't come get them I will burn them!" Now that is shortened and paraphrased but the ad offered leaves and threatened to burn them! I hope it was merely a motivational tool used to encourage people to take his leaves, but I doubt it. Let me apologize in advance if this offends you but burning leaves is completely irresponsible! It pollutes, it wastes, and it's just plain dumb. Now I'll forgive you if you have burned leaves in the past not realizing why you shouldn't but why would you waste a free and valuable soil conditioner? A mulch that comes down from the heavens to keep the moisture in the ground and feeds the bacteria and earthworms that turn regular soil into fantastic garden gold! Sorry but the issue of burning leaves has always burned me up.

I also meant to discuss lawnmower maintenance. Sharpening the blades, running out the gas, checking the spark plugs and changing the oil are all good things to do now so that your mower will be fresh and ready to go come spring. A little maintenance now is a good thing. (Of course this is yet another thing to add to my Things I've Neglected List!) Running the gas out keeps it from gumming up your engine over the winter.

I mentioned the leaves on the radio but completely ran out of time for the lawnmower talk. Why you ask? Maybe you didn't ask but as I often do I'll tell you anyway. The City Codes inspector mentioned the installation of a rain garden here in Spring Hill at Harvey Park! This coming Saturday from 9AM-1PM volunteers will be helping to create and plant a garden that will help filter water and preventing it from washing contaminants into our stream system. As soon as he mentioned rain garden I grinned. I've installed two kinds on my property and both have been very effective problem solvers. I wasn't necessarily worried about contaminants but was concerned over excess water pooling on our driveway and in another location flooding into our yard through the neighborhood drainage system.

Rain gardens use the root systems of plants to retain soil and to soak up the water to keep it from washing sediment into the streams. The plants serve as filters and clean the water before it enters the streams which is much better for the fish and wildlife that use those areas. One kind of rain garden uses a drainage area underneath a garden as a water holding area. That was actually the first type of rain garden I installed. It collects water from our driveway and brings it into a gravel area below a planting bed I established. Inside the bed are a combination of flowers and grasses that so far have enjoyed the extra water in that location. I've even planted a Yoshino Cherry tree that is definitely thriving in that location. This type of rain garden is more labor intensive to install as it involves digging deep into the soil and putting gravel where the soil was then back filling. It's very effective in absorbing water and solving drainage issues.

My second rain garden was done completely with plantings. Ornamental grasses are prominent along with a birch, beautyberry, and several perennials. The area used to flood back into our yard but the plantings help to defer the water back into the established drainage area and retain some of the moisture in the soil underneath. In the picture the area that is flooded is on my neighbor's property. It was taken back in September just after an extremely heavy rain. If these types of gardens lined our community drainage systems we would all have healthier water systems with fewer erosion problems.  

I was pretty excited to hear that our town is on the forefront of such environmentally sensible ideas. I would like to be there helping them install it but I have a birthday party to attend for a certain almost 2 year old girl! Maybe I can get out there early to help, we'll see, maybe you can too!

The Rain Garden Photos

Early last year I put together a rain garden in our yard to absorb some of the driveway drainage. Here are a few pictures of how it looks now!

Inside the garden we have a variety of perennials that are generally carefree and tolerate a wide range of growing conditions. Plants like coneflowers. Echinacea purpurea is having a perfect year here in our garden.


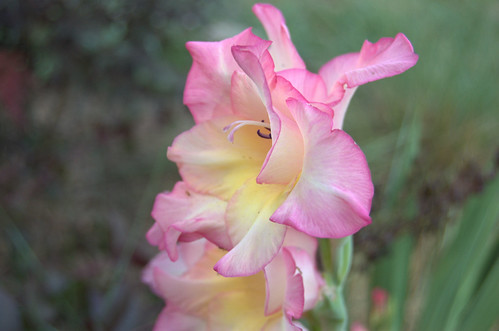
If we change our focus a little we can view the gladiola. One of the few summer blooming bulbs I've added to the gardens. They look really nice when they stand upright but have a terrible tendency to topple toward the turf! Those little green bamboo stakes would be good to help stake them up if necessary.


The pale pink blends nicely with the purple of the coneflowers but the gladiolas look great all by themselves as well.


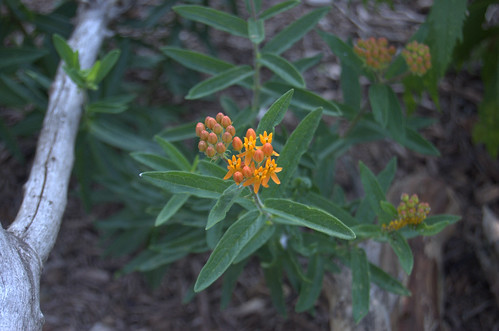
Asclepias tuberosa or orange butterfly weed is a fantastic, easy care perennial. It doesn't transplant very well due to the large tuber so if you decide it needs to be moved you had better move much of the dirt around the roots as well. You'll see butterfly weed growing along roadsides and it grows readily from seed planted directly in the garden.


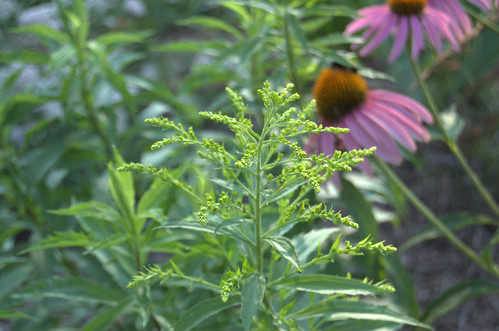
It's not blooming yet but this ornamental golden rod (aren't they all?) is beginning to bud. Over the years varieties of golden rod (Solidago) have been bred to grow as shorter heights with different flowers than what we normally see in the wild. Unfortunately many people don't see the value of golden rod in the landscape as they get it confused with a more infamous plant: ragweed. Both plants blooms at the same time and golden rod gets blamed for the allergy problems associated with ragweed. Golden rod is insect pollinated while ragweed is wind pollinated. 


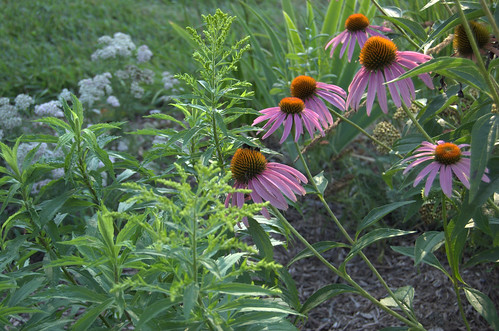
Here you can see the golden rod's placement next to the coneflowers. It should look very neat with the purple and gold colors blending together in the late summer raingarden.


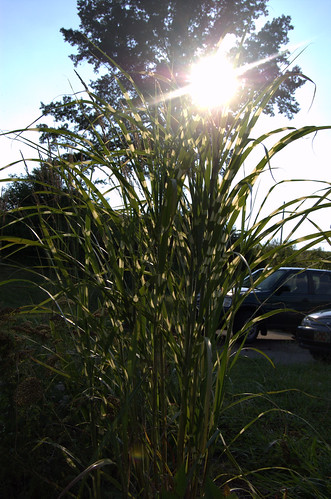
One of the two kinds of ornamental grasses in the raingarden is Miscanthus sinensis 'Zebrinus' also known as Zebra grass. I took advantage of the setting sun to capture some back lighting for the photo. You can really see the variegation in the leaves of grass.


Due to Garden Blogger's Bloom Day on Wednesday (and poor planning on my part) I'm delaying Worst Weed Wednesday until July 29th. Wednesday July 22nd isn't an option since I'll be unavailable for blogging that day. I'll post a reminder toward the end of next week!

A Rain Garden Update

A while back (a real long while) I setup a rain garden to take care of a drainage issue on one part of our driveway. Rainwater was pooling in one area of our driveway because it had no where else to go. The grass and soil was higher than the driveway on the side the water should have been draining. The big problem was that anytime our cars were parked in the driveway after a rain there was standing water. Either I had to step into the water or learn to walk on water to get into the car (I'm just not good enough to figure that trick out). Since neither of these possibilities were feasible I came up with the rain garden. rain gardens can be made one of two ways: either sloping areas guide the water away from the problem spot along with a series of plantings to absorb the excess, or a sort of drainage tank is developed under the soil and covered then planted. I chose to dig a trench and a pit for the water to drain into then fill it halfway with gravel and the other half with soil. It worked very well. I've checked it after many heavy rains and found little to no standing water in the area.

Last year I never really got the garden going like I wanted. Daylilies that I planted never bloomed, zinnias were all over the place (way too many in my book), and many of the other plants were just too little to even be recognized. That's the way I garden though, plan for the future and not pay too much out of pocket! This year the rain garden is looking much more impressive, maybe not grande like the Lurie Garden that the Spring Flingers got to enjoy, but it's coming along nicely!


OK it's nowhere close to that famous garden but just wait until August when everything is in its peak bloom. Most of my summer perennials seem to put on their best displays in the heat of summer.

I have a couple forms of ornamental grasses in this area. One is the 'Zebra Grass' Miscanthus sinensis which I eventually plan to move somewhere else. The other is my 'Karl Foerster' Feather reed grass (Calamagrostis x acutiflora) which I want more to plant in the garden. I'm definitely a fan of the purple seed heads that bloom in early summer rather than in the fall like many other ornamental grasses. I'm envisioning it as a small screen in front of the rain garden. Once you pass by the feather reed grass you will see the rest of the blooms bursting forth. At least that's the plan for now. Like the weather my plans are always subject to change.


If you want a powerful bloomer for a full sun location look for an achillea. They need almost zero maintenance and they are drought tolerant. One thing that makes it even better is that to this date I have never had one munched by a rabbit. Propagation og achilleas couldn't be simpler. Just take a sprig (offshoot) from the plant and place it under soil in the garden. I did this last fall and have had several nice looking plant ready for this year.

My achilleas come in two colors (there are many more), a pinkish-white or a mostly red with yellow highlights. I believe this one is called 'Paprika', aptly named don't you think?


If we hop over to the opposite side of the 'Paprika' yarrow we will find Rose campion (Lychnis coronaria). I think I found this at a plant swap but until started blooming this year I really didn't even know I had one! They tend to be spreaders but I think I can tolerate it since the flowers are so presentable!


I hope this garden will become a breeding ground for many of my favorite flowers like the coneflowers. These were all volunteers from the birdbath garden that I transplanted to the rain garden. I'll continue spreading the seeds as they form to create a nice balance between the feather reed grass and the purple coneflowers.
Around the base of the coneflowers you can see some coreopsis that survived the leaf beetle larvae attack. I like coreopsis, it takes a licking and keeps on tickseeding! (Please forgive the horrible pun!)

Here's a close-up on one of the coneflowers. It's a regular ol' purple coneflower (Echinacea purpurea) but I also have some from the big sky series elsewhere. One I even made from a basal stem cutting last year.


We'll end the tour with a summer flowering favorite in many gardens, rudbeckia! I wonder who this beetle is paying it a visit?

Finding Decorative Solutions to Drainage Problems

Last week I put together another downspout dry creek bed to help escort the water away from the house foundation. We don't really have any issues with too much moisture around the house but it's better to think preemptively and solve those dilemmas before problems arise. Besides this is such an easy project to do that it can be started and finished within 30 minutes.


This is the second downspout dry creek bed I've put in this year and it only involves a three steps.
  1. Direct the water down the pathway by digging a trench a little deeper than you need it.
  2. Lay a plastic layer over the trench to keep water flowing away from the house.
  3. Cover with stone. I used a combination of gathered limestone and pea gravel. After the pea gravel I edged it with the other stones and made patterns.
Toward the middle I placed on stone across the creek for a miniture bridge. You can't see it too well in the picture but I also placed a sprig of 'Walker's Low' Catmint to the right of the dry creek bed. The idea is to allow the rainwater to brush against the fragrance foliage of the catmint to transmit that scent all around. We'll see how that works. If it doesn't work at least it will look great! Also in this area are redtwig dogwoods, a crape myrtle to the left, and some salvia to the right. All of these plants except the crape myrtle came from cuttings. The crape myrtle was a transplant from my parent's house.

My State of the Garden Address

Our president gave us his State of the Union address for 2010 this week and informed us of his plans and his thoughts so I thought why not do the same for my garden? It’s been a while since I’ve addressed the garden as a whole entity as usually I just discuss its parts or its plants. Let me start off by saying it’s not necessarily a pretty picture. It is winter after all!

As I walked around the gardens today I had an opportunity to view what has been accomplished and what has yet to be done. The front garden hasn’t undergone many changes over the last year but it is due for some redeveloping. The Russian sage on the left of the sidewalk has grown large and it is time for it to be tamed or moved. It’s wispy and bare now but its white stems make an attractive winter feature and would look especially nice in front of an evergreen backdrop. I clip it back each spring but it likes to grow, and grow, and grow - I really can’t blame it! I have some options on a new location but then I’ll have to figure out what to put in its place…

Front Sidewalk Garden in January  1-2010-1

I walked around the other side of the house to the self-sowing/self-seeding garden. It's inaugural year was very progressive and was full of blooms. Rudbeckia, sunflower, salvia, zinnias and several other plants filled up the seats in this garden.

Self-Seeding Garden in Winter 1-2010-1

And I couldn’t fully evaluate the state of the garden without the arbor. (Arbor and The House) I still enjoy looking at it. I feel like I won the BHG.com prize even though I lost out to a front porch repainting (it was pretty, definitely not our style though!). I saw in the recent Tennessee Gardener magazine and article about roses that had pictures of roses climbing all over gates – it’s a very tempting idea for this arbor don’t you think?

Pathway Entry Arbor in Winter 1-2010-1

Past the arbor you will find one of my favorite gardens – during the growing season that is! The corner shade garden is filled with heucheras, hostas, astilbe, and an oak leaf hydrangea. The large evergreen tree on the left will be leaving very soon for multiple reasons: it’s too big to be this close to the house and it’s covered with bagworms. I could spray the worms (at the right time, when the larvae are still young) and probably get rid of them or handpick the ones I can reach but when you have more than one issue with a plant it might be time to go a different route. I tried the handpicked route once before and I couldn’t find all the bagworms. I have two ideas for its replacement either a dogwood (Cornus florida although I wouldn’t mind a Cornelian Cherry Cornus mas) or a Forest Pansy Redbud. If I go the latter route I’ll move the one I have to its new location.

Corner Shade Garden in Winter 1-2010-1

The border garden looks mostly bare but the ornamental grasses do liven things up. The birch I planted in spring did fantastic this year and is already beginning to show its characteristic peeling bark. I can’t wait to take a similar photo of this area in the spring, summer, and fall so that I can see the seasonal changes. 

Border Garden in Winter 1-2010-1

This little rose campion is sporting some nice silver green foliage in the rain garden. There are quite a few other plants with foliage showing like the irises, daffodils, hyacinths, and several others. It’s still January but if you look you can see spring coming.

 Rose Campion in Winter 1-2010-1

I took too many pictures for a single post so come back for Part 2 of my State of The Garden Address! This post was mostly the front and side yard gardens the next one will include the back yard gardens and probably a picture or two of the greenhouse (look here for an update on the greenhouse).

Rain Garden Update

The other day the rain garden completed a mini-test. It really was more of a pop quiz. It wasn't multiple choice or fill in the blank. It was true or false, did it work or not? There was only about 0.34 inches of rain but it easily handled that amount. Here's what the drainage looked like before the rain garden was installed:


Notice the standing water on the edge of the pavement.

Here's what it looked like after the pop quiz.


As you can see I've put some of the decorative gravel down. I decided to spread out the cost of the stone over several visits to the store so what you see is only the first three bags. If you look at the pavement you can see very little standing water and some water streaks from where the water went through the dirt that was on the driveway. No puddle! I give this little quiz an A at the moment but a bigger test is still needed to see if it does the trick.

Other Rain Garden Links:
The First Step to Recovery
Digging the rain Garden
On Today's Agenda: Working on the Rain Garden
The Rain Garden is Almost Done

The Rain Garden is Almost Done

The rain garden is very close to being finished. We worked most of the day and managed to get the soil put in to make the planting bed. All that is left to do is to select plants and cover with mulch!

Here's a look at today's progress:

Here is where I ended the other evening. A big hole with a trench. The picture is a little dark but you can still make out the trench for the water leading to the rain garden area itself.


The next step was to make the hole larger and create a trench parallel to the driveway to serve as a water collecting trench. Then we laid a piece of perforated drain pipe in the parallel trench. Before we laid the pipe we put gravel down in the trench. The gravel helps to improve the drainage and allows for better water flow.


Here is the expanded rain garden area. It could be a little larger but this basin should hold the amount of water we need to manage our drainage problem.


Here is one of my assistants hard at work! I hope that's not a violation of any labor laws...


On the left is a view of the "T" connector pipe that we used to connect the two pipes together.


On the right is my assistant doing some pretty important things. I'm not quite sure what those things were, but she knew and I guess that's all that matters!


Here is another view of the "T" connector pipe. These parts are very easy to assemble. You just snap them together and the grooves lock them in place.


On the right and below you can see the rain garden and drain pipe trenches filled with gravel.


Here is the nearly complete rain garden. The bed itself is raised slightly higher than the surrounding ground to help define the planting area. In the foreground you can see the gravel area that will eventually be covered with decorative gravel.


On the right is another view of the planting bed.


We managed to fulfill my goal of filling the bed with soil. We still need to put in the decorative gravel, plant the bed, put grass seed in the trench, and mulch. The hardest part is done! I expect the rain will settle the soil some and we may need to add more dirt to the bed.

A big thank you needs to be said for my dad, who helped shovel a bunch of dirt, a bunch of gravel and drove the truck to the yard! So Thanks Dad!

On Today's Agenda: Working on the Rain Garden

Here's just a quick list of what needs done with the rain garden in chronological order.

1) Finish excavation: I need to expand the "Big Dig" to its final size. I'm not 100% sure how much bigger I'll make it but I want to shape into more of a curve. I also need to finish excavating the channel parallel to the driveway.

2) Go get the gravel: We need to run to Beasley's (our local stone, mulch, and dirt dealer) to pick up a truckload of limestone gravel.

3) Lay a 2" layer of gravel in the channels and in the rain garden area: For drainage.

4) Lay the perforated piping: We will put the piping into a "T" shape. One piece will go in the parallel channel and will connect with a "T piece." Then the "T" piece will connect with the channel that goes to the rain garden.

5) Put down more gravel: Cover the pipe with enough gravel for good drainage.

6) Cover with landscape fabric: this will prevent the gravel from filling with dirt over time.

7) Go get fill dirt from Beasley's: To fill up the rain garden area and the trench to the rain garden.

8) Fill up the remaining areas with soil.

9) Get decorative gravel for the trench parallel to the driveway.

10) Mulch the rain garden area.

11) Rest and observe our work.

I don't know how much of this will get done in one day. My goal is to get at least to number 8 but that may be optimistic. Fortunately I have a good start on it already and I'll have help today from my dad.

One Year Ago I Was...

...digging the rain garden. I looked back at the January 12, 2008 post to see what I wrote about one year ago. During that week I was heavily entrenched (forgive the pun) in digging the rain garden. Today I'm very pleased with how well it functions. This January we've had at least 3 inches of rain so far, possibly more, and the rain garden has absorbed 100% of the rainfall. It will easily handle 2 inches of rain every 24 hours. The plantings need more work. I wasn't happy with the zinnias I put there. They looked great but grew too tall for the spot. The rudbeckias did well but most of the other plants were small perennials that really needed another growing season to get established. I'll show it's progress more this spring but here are the posts I put together one year ago about the rain garden's construction.

The First Step to Recovery
Digging the Rain Garden
The rain Garden is Almost Done

Digging the Rain Garden

Thanks for guessing at my post the other day called Digging a Hole. Creative title right? Nan of Gardening Gone Wild, Tina of In the Garden and Gloria of Pollinators-Welcome all guessed right, it's a rain garden. Our driveway is a slope and at the bottom of it is an area that collects and pools water after each rain. Rain gardens are a good solution for dealing with water runoff problems. They help to filter out the chemicals that run off our streets and driveways before the water enters our water supply. To do this rain garden I'll need to construct a French Drain. If you would like to look back I mentioned the French drain I was planning on building in my post called The First Step to Recovery... That post also contains a picture of the drainage issue.

To review briefly I'll place a layer of gravel in the trench I dig. Then I'll place a perforated pipe through the trench toward the rain garden area. I'll cover it with gravel, then landscape fabric, then top the planting areas and grass area with soil. The area next to the driveway I'll top with decorative gravel. The landscape fabric will keep the dirt separate from the gravel which will improve drainage.

Now the fun part!
To me the fun part is putting in the plants for the rain garden area. I plan on the garden itself to be slightly higher (3"-4") than the surrounding ground surface. This will help to define the bed a little more and give the plants a little more soil to root through. I need plants that like water but can tolerate drought. Kind of contradictory but believe it or not something comes to mind: ornamental grasses. This past fall I rescued a Calamagrostis x acutiflora 'Karl Foerster' (feather reed grass) and a Miscanthus sinesis 'Zebrinus' (Zebra Grass) from the big blue box home-improvement store for less than five dollars. I divided the Miscanthus into four plants, two of which are in my bird bath garden and the other two are eager awaiting homes. I'll let these three plants find refuge in the rain garden. In addition to those two grasses I am considering a fountain grass of some sort. I'll figure that out sometime this spring. The grasses can absorb a lot of moisture from the ground and tolerate our heavy heat in Tennessee. A great companion plant to the ornamental grass is the old standard and favorite rudbeckia. Black-eyed Susans, with their dark centers and yellow petals, would look great mixed in with ornamental grasses. I also have my eye on a particular annual salvia called Salvia splendens 'Flare.' This is an annual salvia (possibly a tender perennial) that sends up a red flower spike around 18 inches tall. I'm also thinking of some Zinnias since those are nearly foolproof!