We all know we should compost. Most of use know the things we can compost. So here's a couple ideas to help you compost!
1. We have a compost bucket outside our back door. The 5 gallon bucket stands ready to collect the compost until we can take it to the big bin in back. There are compost buckets you can bring indoors that have fancy carbon filters to minimize odors, but we don't have one for two reasons: we already have a bucket and we don't have enough room inside our kitchen! When we accumulate compost we can just open the back door and dump it into the bucket. We put several 1/4 inch holes in the bucket on the sides, on the top, and on the bottom so the compost could get oxygen. We secured the top of the bucket with a large rock so that animals can't lift it off. This bucket used to be our primary compost maker when we were living in our apartment. It just sat on the back porch making "gardener's gold."
2. We reuse newspaper bags to hold compost in the garage until we can make it out to the compost bin. It all depends on the weather. If it's raining we'll put the kitchen scraps in the newspaper bags then give them a twist. The twist prevents the kitchen scraps from emanating odors. Then we put the compost bag in the garage. If it's not raining we use the compost bucket. If you don't receive newspapers or they don't have the plastic bags then you can use old bread bags.
Of course if we're having warm weather then the walk to the bin is a great excuse to get outside!
.

Showing posts with label compost. Show all posts
Showing posts with label compost. Show all posts
Random December Gardening
Today I did a few garden related things just to get outside - nothing major - nothing terribly exciting. Just a few little things as an excuse to breathe some fresh (and rather cold) air. The weather forecast calls for snow flurries over night but little or no accumulation - at least in our area.
Butterfly Bush Cuttings

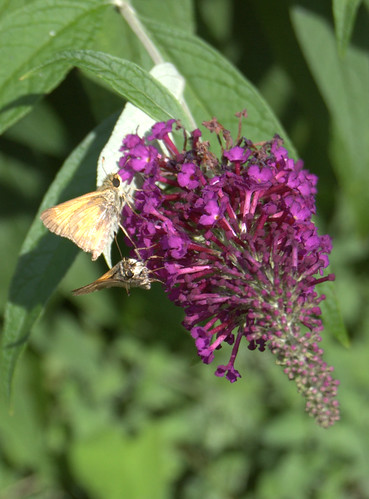
I took about 20 cuttings from one of our butterfly bushes. It's the one in the birdbath garden and was admired by my garden club when we met at my house in the summer. Of all the plants in my garden that I find fascinating the red twig dogwoods, the 'Powis Castle' artemisia, the salvias, the gaillardia the one that received the most comments was the butterfly bush! I gave away many cuttings that day but no one has reported back to me that any lived. I figured I would root some hardwood cuttings to give away in the spring. Butterfly bush is really easy to root. I used rooting hormone on cuttings with multiple nodes and stuck them in sand (see my page on rooting butterfly bushes for more "how to" details). I put them in a nice pot indoors for them to root over the winter. Hopefully in a few weeks I'll have some rooted cuttings to share. (Free plants are just one benefit to becoming a member of garden clubs!)
I Dumped out the Compost
I took a load of compost that's been sitting in an old nursery pot just off of our patio. I use the old nursery pots as temporary holding spots for compost material until I can get around to dumping it in the back compost bin. It works pretty good except that when it gets cold I get lazy and I don't get the compost back to the bin as often as I should!
I Tinkered on the Blog
Last year I put together a post to use as a directory of sorts for all the landscape plans, designs, and layouts that I've put together for our yard over the years. I spent a little time today improving the layout of the layout page! I added short descriptions, thumbnail pictures of the designs, and arranged the thumbnail pictures to double as links to the post where I talked about the plan.
And that's about it! I know it's not much but maybe, just maybe, it was enough for me to get outside for a few minutes.
Butterfly Bush Cuttings
I Dumped out the Compost
I took a load of compost that's been sitting in an old nursery pot just off of our patio. I use the old nursery pots as temporary holding spots for compost material until I can get around to dumping it in the back compost bin. It works pretty good except that when it gets cold I get lazy and I don't get the compost back to the bin as often as I should!
I Tinkered on the Blog
Last year I put together a post to use as a directory of sorts for all the landscape plans, designs, and layouts that I've put together for our yard over the years. I spent a little time today improving the layout of the layout page! I added short descriptions, thumbnail pictures of the designs, and arranged the thumbnail pictures to double as links to the post where I talked about the plan.
And that's about it! I know it's not much but maybe, just maybe, it was enough for me to get outside for a few minutes.
My Simple Compost Solution
You can go out and spend all kinds of money for a fancy compost bin but sometimes a simple solution can work just as well. In the interest of full disclosure, I am a lazy composter. There I said it. I don't get out there to the bin to turn it regularly. I don't check it with a fancy compost thermometer to make sure the temperature is ideal. I don't add special compost ingredients designed to speed along the process. I probably should but I don't. I suspect if I did I would have a lot more finished compost available for my gardens. But as I said, I'm a lazy composter. I'm also a cheap composter. My big bin is a group of 4 pallets screwed together. Three pallets are actually attached and the fourth I use as a loose barrier that I move out of the way on the rare occasion I turn the pile! Most of the pallets came from transporting the paving stones for my patio project last year. Total cost - $0.

My point in revealing my composting secret is to say that you don't have to do much to get compost. If you wait long enough compost happens. Six weeks ago the compost bin was filled high up to the top board in the back with a variety of grass clippings, weeds, and spent garden plants. Today its as you see it with nearly half of the vegetable matter gone. I never turned it. Our kitchen scraps, leaves, and grass clippings go into the compost bin. Grass clippings are a little secret of mine. Adding 1-2 bags of grass clippings each time I mow greatly increases the speed of the compost - without turning.
You don't even have to have a compost bin to compost, a pile in the backyard works great although it isn't the prettiest thing in the world. Or you could trench compost. Dig a trench where you want to plant a garden and gradually fill it in with compost then cover with soil. Plant your plants in the spring over the compost trench and they will have easy access to the yummy nutrients you added. Just be sure to keep the animal products out of the bin as they can attract animals!
What Do I Compost? Vegetable scraps, coffee and tea grounds, egg shells, grass clippings, leaves, weeds, dead plants, shredded newspapers, and I even once threw in an old pair of holey jeans. After all jeans ARE made from cotton! Have you composted anything more unusual than jeans?
I hope to add a second bin soon with parts from another pallet I have handy as well as my old compost bin. Maybe by adding that second bin I can start a more regular turning process. Or maybe I'll just be twice as lazy!
From my window...
From my window I can see my homemade compost bin, unfinished as it is, with our poor ole jack-o-lantern resting its big orange head on the grass clippings from my last mowing. That relic of a Halloween come and gone will come around again next year in some way. Either as broken down black gold or in the seeds that he left behind. His progeny will most likely grace us next season with lots of little orange gourds ready to be carved and given personalities of their own! Soon I'll add some leaves to the top of the bin and won't be able to see our old friend Jack, but he'll be there. In fact he might even be in my tomatoes next year, who knows?
What Do These Things Have in Common?
What do Obama, McCain, the Nashville Predators, recipes, a 2002 Chevy, and the Williamson County Honor Roll have in common? Well it's not politics if you can believe it! While I have definite political opinions, I wish to stay non-partisan on this blog and will have to tell both Obama and McCain that they will now become dirt, or really compost! What am I talking about? Newspapers!
Change is definitely coming thanks to bacteria and beneficial microbes as they eventually break down our old newspapers. And to those who made the honor roll, congratulations you did a great job, but now its time to make yourself useful in the garden. As for the Chevy, the Predators and the various recipes we have no use for they will join the myriad of published stories that will help our garden grow! Putting shredded newspaper in the compost bin is just one neat idea for getting more brown material to make that coveted substance called gardener's gold.

The process is pretty simple. Just take a little shredder, a trash bag and trash can to mount the shredder on then shred away. Ideally a cross cut shredder works best since the pieces will be much smaller but the regular cut shredder we have works well enough. It's the same principle behind leaves in the compost bin, the smaller the pieces the quicker it will break down. You will still want to mix your compost well with green materials and keep it aerated by turning it but the shredded newspaper is a great way to help fill that bin.
Most newspaper today is made from environmentally safe products like paper and soy ink. The glossy parts of the paper like your advertisements and coupons should be avoided since they may contain harmful chemicals in the ink and won't break down as fast. It's just one fitting end to our Tennessean newspaper!

Change is definitely coming thanks to bacteria and beneficial microbes as they eventually break down our old newspapers. And to those who made the honor roll, congratulations you did a great job, but now its time to make yourself useful in the garden. As for the Chevy, the Predators and the various recipes we have no use for they will join the myriad of published stories that will help our garden grow! Putting shredded newspaper in the compost bin is just one neat idea for getting more brown material to make that coveted substance called gardener's gold.

The process is pretty simple. Just take a little shredder, a trash bag and trash can to mount the shredder on then shred away. Ideally a cross cut shredder works best since the pieces will be much smaller but the regular cut shredder we have works well enough. It's the same principle behind leaves in the compost bin, the smaller the pieces the quicker it will break down. You will still want to mix your compost well with green materials and keep it aerated by turning it but the shredded newspaper is a great way to help fill that bin.
Most newspaper today is made from environmentally safe products like paper and soy ink. The glossy parts of the paper like your advertisements and coupons should be avoided since they may contain harmful chemicals in the ink and won't break down as fast. It's just one fitting end to our Tennessean newspaper!
Today in the Garden
Today in the garden I spent a good deal of time cleaning up and clearing out the old vegetables of the 2008 season. The tomatoes are gone as are the cucumbers, squash, and beans. The cantaloupe stopped producing weeks ago and surprisingly the watermelon gave us one more last week before its demise. It wasn't much of a watermelon but it was a tasty surprise. Everything has an end, or does it?
 The leftovers of this season have now been placed into the new compost bin. It's not exactly new, as it has been fashioned form three old wooden palettes, but it is our newest garden addition. New to us! I put a picture of the palettes in this post but I haven't taken one since it was completed. Into the new bin went all the collections from the garden plus those annuals that have faded already due to the frost. My 4'x4' bin is already full.
In addition to filling up the new bin I also turned the compost in our other bin today, literally. Or maybe I should have said I turned my compost bin...over! I flipped it over to dump out the compost that was in the bin. It needed to move to a more discreet area of the yard and had to be emptied before moving. I sorted the decomposed compost out and dumped it into the garden beds. In the end three loads of compost were added and the rest of the old bin's contents were moved to the new bin. The partially decomposed compost should help activate the new bin and encourage good microbial growth! All of the 2008 vegetable garden will end up in the garden as compost next year and the cycle will continue.
The last order of the day was to plant a few bulbs. I put in five hyacinths to the Japanese maple garden. They are now right next to our new patio and should provide us with some color and fragrances in the spring. I'll be adding some of the 91 daffodils I have left to plant to that garden also. Gardening sure doesn't slow down in the fall!
 The leftovers of this season have now been placed into the new compost bin. It's not exactly new, as it has been fashioned form three old wooden palettes, but it is our newest garden addition. New to us! I put a picture of the palettes in this post but I haven't taken one since it was completed. Into the new bin went all the collections from the garden plus those annuals that have faded already due to the frost. My 4'x4' bin is already full.
In addition to filling up the new bin I also turned the compost in our other bin today, literally. Or maybe I should have said I turned my compost bin...over! I flipped it over to dump out the compost that was in the bin. It needed to move to a more discreet area of the yard and had to be emptied before moving. I sorted the decomposed compost out and dumped it into the garden beds. In the end three loads of compost were added and the rest of the old bin's contents were moved to the new bin. The partially decomposed compost should help activate the new bin and encourage good microbial growth! All of the 2008 vegetable garden will end up in the garden as compost next year and the cycle will continue.
The last order of the day was to plant a few bulbs. I put in five hyacinths to the Japanese maple garden. They are now right next to our new patio and should provide us with some color and fragrances in the spring. I'll be adding some of the 91 daffodils I have left to plant to that garden also. Gardening sure doesn't slow down in the fall!
10 Great Uses for Fall Leaves
 With fall almost here it's time to start thinking about gardening chores and the task that most people have to do in some way is deal with the leaves. What do you do with the leaves is an important question. For way too long many people have burned them which to me is the worst possible way to dispose of unwanted leaves. Often the leaf burners will use additives like gasoline to help the leaves catch on fire (like they really need any help!) In this post I compiled a list of 10 GREAT things to do with your fall leaves!
Shred the leaves
1) Use them as mulch in your garden beds.
2) Mow them over into small bits and let them replenish the soil of your lawn. Make sure there are no large pieces of leaves that will kill off your grass.
2) Toss them in the compost bin to make compost!
3) Prepare new beds by incorporating the shredded leaves into the soil either by tilling or double digging.
4) Create new garden beds with newspapers then cover with leaves to kill the grass and weeds underneath.
5) Bag the shredded leaves and poke holes in the bags then add a little moisture. By spring you should have some great leaf mold compost.
6) If you don't use them in your garden give them to someone who does! Gardeners love leaves!
On the Creative Side
7) Collect the leaves and save them by flattening them underneath a book or use a leaf press.
8) Use the leaves to make textured stepping stones or garden art. Just make the stones as you would normally but press a variety of leaves into the surface. Any leaf with a strong veining pattern will work. You may have to scrape the leaves off after the cement dries. I suspect that Tina has done this one and can probably tell you more!
9) After drying and flattening the leaves use them for stencils on your walls and art projects.
10) Photograph the pictures and make prints for decorating your home during the fall.
And one more thing!
Photograph the leaves at their peak, blog about them, and use them to participate in The Garden Blogger Fall Color Project!
A Simple and Quick to Assemble Compost Bin
We all know about compost. It's important, perhaps the most important thing we do as gardeners for our plants. Organic matter is critical for plants to get nutrients. It's also extremely helpful as a waste disposal system. Rather than throw away your biodegradable wastes from the kitchen you can compost it and use it later for the garden. Composting makes a lot of sense.
 There can be a lot of options when making a compost bin. You can go cheap and just make a pile in a corner of your yard, you can go fancy with a dual rotating bin composter, or you can go somewhere in between which is where I'm going for today's post. All my materials for this bin were furnished by Lowe's Creative Ideas (Blogger Network).
.jpg) The compost bins I put together were very easy to assemble and look pretty nice too. I found some metal no dig fence panels at Lowe's for a little over $20 per pair that worked perfectly. The panels hook together at the corners with two hinges. Each corner can be staked in with the stakes provided. When you connect four of these panels together you can make a box perfect for a decorative compost bin! I bought 4 sets of these panels to make two bins and put them in my vegetable garden near my greenhouse.
The compost bins I put together were very easy to assemble and look pretty nice too. I found some metal no dig fence panels at Lowe's for a little over $20 per pair that worked perfectly. The panels hook together at the corners with two hinges. Each corner can be staked in with the stakes provided. When you connect four of these panels together you can make a box perfect for a decorative compost bin! I bought 4 sets of these panels to make two bins and put them in my vegetable garden near my greenhouse.
.jpg)
.jpg) These bins are very open which is great for oxygen and convenience. Microbes need oxygen to survive just like we do. One side can be opened completely when turning is needed to provide oxygen to the middle of the pile. While I haven't done this yet a perforated pipe can be installed in the middle of the bin to increase oxygen circulation. I laid down newspaper to help prevent any weeds from growing up into my compost bin.
These bins are very open which is great for oxygen and convenience. Microbes need oxygen to survive just like we do. One side can be opened completely when turning is needed to provide oxygen to the middle of the pile. While I haven't done this yet a perforated pipe can be installed in the middle of the bin to increase oxygen circulation. I laid down newspaper to help prevent any weeds from growing up into my compost bin.
.jpg)
.jpg)
.jpg)
.jpg)
Another huge advantage to bins like these is the size. I have a lot of yard waste that accumulates on our 1.3 acre lot. Weeds, pruned materials, and in the fall I collect tons of leaves for the compost bin. These bins can hold about 27 cubic feet of organic matter each. 54 cubic feet of potential gardeners gold! All they need is water, oxygen, and time to break down into usable materials.
.jpg)
What can you compost? Vegetable matter from kitchen waste, eggshells, coffee grounds, leaves, weeds (avoid weeds with seed heads already formed), cardboard, newspaper, and virtually any organic material. It is always recommended to avoid putting meat and diary byproducts in compost bins. They may attract animals. You should also avoid composting any diseased plant material. Many plant diseases can survive in the soil from year to year and will do the same in compost.
For other compost bin options you could use chicken wire wrapped around posts, pallets, cedar fencing materials, or buy a ready made compost turner. There are many options! Do you compost? What kind of bin do you use?

.jpg) The compost bins I put together were very easy to assemble and look pretty nice too. I found some metal no dig fence panels at Lowe's for a little over $20 per pair that worked perfectly. The panels hook together at the corners with two hinges. Each corner can be staked in with the stakes provided. When you connect four of these panels together you can make a box perfect for a decorative compost bin! I bought 4 sets of these panels to make two bins and put them in my vegetable garden near my greenhouse.
The compost bins I put together were very easy to assemble and look pretty nice too. I found some metal no dig fence panels at Lowe's for a little over $20 per pair that worked perfectly. The panels hook together at the corners with two hinges. Each corner can be staked in with the stakes provided. When you connect four of these panels together you can make a box perfect for a decorative compost bin! I bought 4 sets of these panels to make two bins and put them in my vegetable garden near my greenhouse..jpg)
.jpg)
.jpg)
.jpg)
.jpg)
.jpg)
Another huge advantage to bins like these is the size. I have a lot of yard waste that accumulates on our 1.3 acre lot. Weeds, pruned materials, and in the fall I collect tons of leaves for the compost bin. These bins can hold about 27 cubic feet of organic matter each. 54 cubic feet of potential gardeners gold! All they need is water, oxygen, and time to break down into usable materials.
.jpg)
What can you compost? Vegetable matter from kitchen waste, eggshells, coffee grounds, leaves, weeds (avoid weeds with seed heads already formed), cardboard, newspaper, and virtually any organic material. It is always recommended to avoid putting meat and diary byproducts in compost bins. They may attract animals. You should also avoid composting any diseased plant material. Many plant diseases can survive in the soil from year to year and will do the same in compost.
For other compost bin options you could use chicken wire wrapped around posts, pallets, cedar fencing materials, or buy a ready made compost turner. There are many options! Do you compost? What kind of bin do you use?
Thrifty Gardening Tips Part 5: Make Compost
Here is Part 5 of The Home Garden's series of tips on how to garden on a budget.
One of the best fertilizers has to be compost. It's cheap, easy to create, and makes plants grow like crazy. With compost you can replace most of your fertilizer use! Now why don't more people do it? Maybe because they believe composting is difficult to accomplish, or maybe it sounds complicated, or maybe they just never thought about it. Whatever the reason is composting is a very good way to feed your plants and it keeps green waste from ending up in landfills.
What is compost? Simply put it is the leftovers of organic materials after beneficial bacterias, worms, fungi, and other organisms have had their fill. Those leftovers have nutrients that plants need to grow strong and healthy like nitrogen and carbon.
What can you compost? A whole lot of stuff! Kitchen scraps, egg shells, animal manure (not from dogs and cats), leaves and grass clippings, and virtually anything that was at one time a plant! (Avoid black walnut leaves since they a chemical they emit can actually inhibit plant growth.)
How do you use compost? You can supplement or make potting mixes with compost, spread it over new and existing garden beds, and even make a tea for your plants. To make the tea just put a couple spadefuls of compost in a bucket of water and let it steep overnight. Then either pour it onto the plants you want to treat or strain it and put it into a spray bottle to treat the foliage.
With compost it's a good idea to have a designated spot in your yard where you can let it cook over time. You can do this in all sorts of ways.
Here are a few ideas for compost bins:
You hear a lot about the proper way to build a compost pile, which if done properly will decompose very quickly, but even without the proper mix of brown and green materials it will decompose if given enough time.
Here are a couple of general guidelines that may help speed along you're compost if you are so inclined!
For some excellent information on everything you need to know about compost go to Compostguide.com!
Here's quick look at some composters available on the market (from Gardener's Supply).


For more tips on how to garden on a budget visit these other Thrifty Gardening Tips posts!
Thrifty Gardening Tips Part 1: Buying and Saving Discount Discount Plants
Thrifty Gardening Tips Part 1 Follow Up: Buying and Saving Discount Plants
Thrifty Gardening Tips Part 2: The Generosity of Gardeners
Thrifty Gardening Tips Part 3: Save Gas, Only Mow Where You Go
Thrifty Gardening Tips Part 4: Think Small Plants
One of the best fertilizers has to be compost. It's cheap, easy to create, and makes plants grow like crazy. With compost you can replace most of your fertilizer use! Now why don't more people do it? Maybe because they believe composting is difficult to accomplish, or maybe it sounds complicated, or maybe they just never thought about it. Whatever the reason is composting is a very good way to feed your plants and it keeps green waste from ending up in landfills.
What is compost? Simply put it is the leftovers of organic materials after beneficial bacterias, worms, fungi, and other organisms have had their fill. Those leftovers have nutrients that plants need to grow strong and healthy like nitrogen and carbon.
What can you compost? A whole lot of stuff! Kitchen scraps, egg shells, animal manure (not from dogs and cats), leaves and grass clippings, and virtually anything that was at one time a plant! (Avoid black walnut leaves since they a chemical they emit can actually inhibit plant growth.)
How do you use compost? You can supplement or make potting mixes with compost, spread it over new and existing garden beds, and even make a tea for your plants. To make the tea just put a couple spadefuls of compost in a bucket of water and let it steep overnight. Then either pour it onto the plants you want to treat or strain it and put it into a spray bottle to treat the foliage.
With compost it's a good idea to have a designated spot in your yard where you can let it cook over time. You can do this in all sorts of ways.
Here are a few ideas for compost bins:
- You can create a homemade bin using wooden stakes and chicken wire. Just set the corner stakes in the ground and wrap the wire around the bin and you're done!
- You can set up a bin using old wooden palettes. Just prop three palettes up on their ends and attach the corners together. Then get a brace board for the front and you're bin is about ready. You may want to put a removable chicken wire cover on the front for easy compost access!
- You can use cinder block or retaining wall stones to create a very solid bin in nearly any form that you wish. Just be sure the bottom layer is solid or the top will become unstable.
- You can even (if you want to spend money!) buy a fancy rotating bin from garden suppliers like Gardener's Supply Company
! The advantage of turning your compost regularly is an increased air supply for the bacteria that is doing the hard work.
- The cheapest and easiest method (although also the most untidy!) is just to make a dump pile! Just find an area of your yard that you can tolerate a pile of compostable materials and start dumping.
You hear a lot about the proper way to build a compost pile, which if done properly will decompose very quickly, but even without the proper mix of brown and green materials it will decompose if given enough time.
Here are a couple of general guidelines that may help speed along you're compost if you are so inclined!
- Keep it moist but not soggy.
- The smaller the pieces you put in the faster they will decompose.
- Balance the ingredients. A good mix of green and brown materials will optimize the decay.
- Make sure it has enough heat. If doesn't feel warmer than the air around you add some more green materials (nitrogen).
- Turn the compost every now and then to increase air circulation.
For some excellent information on everything you need to know about compost go to Compostguide.com!
Here's quick look at some composters available on the market (from Gardener's Supply).
For more tips on how to garden on a budget visit these other Thrifty Gardening Tips posts!
Thrifty Gardening Tips Part 1: Buying and Saving Discount Discount Plants
Thrifty Gardening Tips Part 1 Follow Up: Buying and Saving Discount Plants
Thrifty Gardening Tips Part 2: The Generosity of Gardeners
Thrifty Gardening Tips Part 3: Save Gas, Only Mow Where You Go
Thrifty Gardening Tips Part 4: Think Small Plants
5 Ways to Save Money on the Garden!
We're always looking for ways to save money and with today's economy what it is it's not just wise, it's crucial for gardeners to save a buck when they can!
There are several ways gardeners can save money on their garden that are really easy to do and don't require anything really crazy. Today's Friday Five post offers up 5 tips to help you save money on your garden. Don't forget to share your favorite ways to save money on gardening in the comments below!
 |
| Gaillardia from a Discount Rack |
5 Ways to Save Money on the Garden!
- Let's start with an important one that I mention often - compost! Compost is composed of a humongous number of living organisms that bring life to the soil. They break down big stuff and make it into small stuff that plants can use. What is that stuff? Nutrients and elements that range from nitrogen to small tiny micronutrients important for plant health. And don't forget what compost does for water retention and regulation! Compost is easy to make, just set a pile of compostable materials in an inconspicuous location and continue to add organic matter! Keep out stuff that draws vermin like meats and dairy while balancing green and brown materials as evenly as you can. Turn as often as you can to speed up the process. Of course I don't do that nearly as often as I should! It works even then! (Just slower.)
- Visit plant swaps! There's one this weekend at Henry Horton State Park that I used to go to until my daughters joined dance class and have had recitals every year scheduled on the same day. Plant swaps are a great opportunity to unload your extras and bring home something new. Every swap is a little different so check out the rules first and see what you can and can't bring. Swaps are a great way to deck out a barren landscape. Often there are plants people don't want to bring home that no one wants - maybe you do though! Be careful because many of the plants could be invasive or aggressive in your garden.
- The discount racks are another way to garden cheap. I visit them regularly to bring home new varieties I can nurse back to help. Often they aren't in bad shape at all but just need to be cleared out for new stock. Last week I brought home two 'Guacamole' hostas from the rack for $2 each. I divided one into three plants and planted the other. Which ends up being $1 per hosta! Pretty cool! This brings up number 4...
- Propagate! Division, cuttings, and seeds are all really great ways to save money. If you have friends with a plant you like ask to get a division of it next time they divide it or get cuttings or seed form it if appropriate. Making cuttings of plants you want to plant enmass is a great way to save on a new garden bed.
- Save your water! Saving water is an awesome way to save money and be environmentally friendly at the same time. Rain barrels probably come to mind first and their great but sometimes saving water is more about using your water efficiently! Water deeply when you water and water less often. Plants generally don't want to be soggy (unless they do ;)) and will grow better if they stretch out their roots to find the water deeper in the soil. Mulching around your plants is also great to retain moisture in the soil.


How do you like to save money in the garden?
5 Easy Ways to Be Organic!

5 Easy Ways to Be Organic
- Feed the soil with compost! Whether your purchase your compost or make it yourself, compost is one of the best things you can add to your soil. It boosts the retention of moisture, improves drainage in clay soils, adds nutrients, and puts beneficial microbes into the soil. Compost won't burn your plants and makes the soil easier for plants to grow a string root system. You can't go wrong with compost!
- Ditch the chemical sprays in favor of organic sprays. Sprays with neem oil do a great job at controlling insects and it's extracted from a plant. Diatomaceous earth can also be used to control insects without doing any harm to animals. Diatomaceous earth comes from fossilized creatures that are crushed. The crushed remains are sharp and cause injuries to all kinds of insects.
- Consider companion planting! I've touched on this before but you can add beauty and function to your garden by integrating flowers and herbs in with your vegetables and fruits. Once you explore companion planting and learn about it giving it a try is a "no brainer"!
- Mulch! Use organic mulches in the garden to retain moisture, keep plant roots cooler, and help feed the soil. Organic mulches like shredded bark chips, hardwood mulch, pine needles, and straw all will break down eventually and feed the soil as they do. Don't choose stone mulches. You do get some permanency with them but that permanency is at the cost of feeding the soil and is difficult to remove later.
- Make your own compost! This should go without saying but really can't be said enough. If we go back to number one on this list you can see why we compost but making it yourself rather than buying it is easy and cheap! Vegetable kitchen scraps, coffee grounds, yard waste, farm animal manure (chickens, goats, horses, cow, etc.), leaves, grass clippings, and many other things can go into your compost bin. Your compost bin doesn't have to be special either. There's no reason to spend money when a pile in the back will be sufficient. My pallet compost bin has produced compost just fine!


Have you explored organic gardening yet? If not I hope you'll give it a try!
*"Traditional" and "Conventional" in this case are used to refer to the methods of gardening that use chemicals. Prior to their invention everything was organic gardening!
Green Gardening for St. Patrick's Day


Go native. Native plants are used to the climate and don't need extra watering or extreme amounts of care like some non-native plants. In general since there is a natural balance already established in the wild damage from any possible escape from cultivation by seed dispersalis minimal.
Reuse materials. If something can be used again in another way or washed and reused it prevents it from going to the landfill. Things like plastic nursery pots, yogurt cups(see my heuchera seedlings for that one), and old lumber can always be reused. Some nurseries collect their old pots for reuse so check with them when you buy your plants if you don't want to reuse them for yourself.
 Ease up on or eliminate chemicals. I believe that chemical use is the enemy of sustainability. That's not to say that chemicals aren't necessary sometimes but we should do what we can to reduce their use. If you give up on having that picture perfect lawn (or at least take a more relaxed approach) and allow the clover to grow you'll give the bees and other pollinators a great food source. Who's going to pollinate your squash when the bees are gone? The gardener will have to bring stamen to pistol since the bees are essential for pollination. I'd rather have the bees do the work! If a few weeds here and there are too much for you then just spot treat the weeds instead of covering the whole lawn with chemicals. If you lay off the insecticides beneficial insects will be more likely to visit your garden. In fact insects like lady beetles and praying mantises can even be purchased to add to your garden. If you've ever seen lady beetle larvae eat aphids you know what good they can do!
Efficiently utilize water. Drought issues have been very common for us here in the Southeast over the last couple years. It just underlines the importance of good water management. When we water we should water deep to encourage the roots to follow the water. The roots will still follow the water if you water shallow but the problems but they won't grow deep. They will become shallow and will stay in the first couple inches of the soil. The deeper roots can get to the moist ground underneath which allows the plants to become more drought tolerant. Watering deeper means you will have to water less often and you will save water and money in the long run.
Irrigate your garden with soaker hoses or drip lines underneath the mulch to prevent water evaporation. Soaker hoses and drip lines put the water on the ground while sprinklers send it into the air. Once in the air it begins evaporating and much of it is wasted.
Consider installing rain barrels along downspouts to collect water when it rains and utilize it for your plants. You could do what I have done and take a plastic storage tote and drill a bunch of 1/16" hiles in the lid. I leave it out in the garden and rain water gradually collects inside. The small holes won't let mosquitoes in and I have an extra source of water for my vegetables.
Never Throw Away Compost! Compost is the best thing for gardens! If you save your vegetative food scraps and toss them in a pile or compost bin over time they decompose and become the best additive you can find for your garden. Not only is it good for your plants but it keeps unnecessary food waste from entering our landfills.
There's just a few tips for "greening" up your gardening for this St. Patrick's Day. Of course it really doesn't matter what you or I do on March 17th, it matters what we do the rest of the year!

Happy St. Patrick's Day!
Making the Worm Bin Part 1
 Part of my worm bin composter is finished. This really is a very simple project that anyone can do at home. To complete this part of the composter it only took about 30 minutes which also included the time to gather the materials and to put them away. Since the weather outside this week is terribly cold this makes a good indoor project to help ease that gardening itch.
I found the basic idea at the Washington State University Extension service. Their site demonstrates a two tray compost bin but if you look the commercially available worm compostering systems have 3-5 expandable sections. I decided to start small and I prepared three plastic containers. The total cost of these was around $15-$18. Your cost may vary due to your local taxes, our sales tax in TN is higher than most.
 I followed the instructions and used a 1/4 inch bit to drill about 20 holes in the bottom of the three containers. This was easy work but tedious when you consider that I drilled somewhere around 60 holes between the three boxes.
 The next step was to take a 1/16 inch bit and drill in air holes around the tops of the containers. Just like us the worms have to breathe! I drilled two rows of air holes along the top. I wasn't sure how many to holes to make. In the end I probably drilled 30 or more air holes on each side of the containers.
The last step in this part of the process was ventilating the top lid. I used the 1/16 inch size bit and drill a bunch of holes. Bunch is a technical term that really means "I have no clue since I didn't count but it seemed like a lot."


I need to rig up a way to catch the liquid runoff from the worm bin. That will be my next project with the worm bin but it will have to wait until warmer weather. The garage is just too cold to work in right now!
Of course you could always try the store bought worm bins but the homemade kind will definitely save you money and should be just as effective!
TARP for Gardening
No I'm not referring to the stimulus package here. I'm talking about what possibly could be the most handy tool you ever use for spring gardening - the tarp. As my gardens have grown over the last several years I've added many more plants. As all gardeners know with more plants comes more responsibility and more work when spring cleanup comes. All dead growth needs cleaned up, pruned out, and disposed of in a good location - ideally the compost bin. Sadly my wheelbarrow just isn't up to the task. It would work in a pinch but would require multiple trips back and forth to the compost bin. The tarp is the simple and easy solution that saves the day!
 That one 6'x8' piece of plastic came in very handy to haul all the garden debris to the back yard for composting, and in one trip. In this case I didn't actually use an official tarp I used 6mm plastic sheeting that can also be used for row covers. It was easy to slide the plastic tarp with a pile of clippings, prunings, and dead leaves 4' wide, 3' high, and 6 feet long across the grass to the very back of the backyard.
TARP definitely saved my gardening today!


TARP definitely saved my gardening today!

New post at Complete Organizing Solutions: 6 Things To Do For Your Spring Garden!
What Do You Compost?
Even in winter compost happens. It may be slower but those microbes are still hard at work turning your pile of waste into "Gardener's Gold." You can compost all sorts of vegetable based materials. I even heard a news story not to long ago in New Jersey where they compost roadkill carcasses! They bury the poor animals in wood chips and in a few months very little remains of the animal. I wouldn't recommend this for the home garden since animal carcasses can (and probably will) attract other animals.
Our compost pile has mostly seen kitchen scraps. Quite a few fruit rinds have ended their journey in our bin including grapefruit, orange, and avocado peels. Vegetable leftovers like tomato bits, lettuce, and the stalks of celery that never get eaten because they were forgotten about in the bottom tray of the refrigerator have all been composted. Nothing very unique there! Grass clippings and leaves have both been used. Sticks and pruned branches have been donated to the bin for the composting cause as have coffee grounds, tea bags, egg shells and onion scraps. All these things are pretty standard fare for your typical, everyday, run of the mill compost bin.
So here's the question:
What is the most unusual item(s) you have ever composted?
I suppose the most unique thing we have composted would either be the brown toilet paper roll and paper towel tubes left over after the roll is used or our old friend Jack. (Don't panic! Jack wasn't a real person! )
Nothing really crazy here but I'm interested in seeing if there's anything out there that other people may not have thought about composting! Feel free to talk about it on your blog if you have one or comment here if you don't! Just post a link so people can find your blog.
Our compost pile has mostly seen kitchen scraps. Quite a few fruit rinds have ended their journey in our bin including grapefruit, orange, and avocado peels. Vegetable leftovers like tomato bits, lettuce, and the stalks of celery that never get eaten because they were forgotten about in the bottom tray of the refrigerator have all been composted. Nothing very unique there! Grass clippings and leaves have both been used. Sticks and pruned branches have been donated to the bin for the composting cause as have coffee grounds, tea bags, egg shells and onion scraps. All these things are pretty standard fare for your typical, everyday, run of the mill compost bin.
So here's the question:
What is the most unusual item(s) you have ever composted?
I suppose the most unique thing we have composted would either be the brown toilet paper roll and paper towel tubes left over after the roll is used or our old friend Jack. (Don't panic! Jack wasn't a real person! )
Nothing really crazy here but I'm interested in seeing if there's anything out there that other people may not have thought about composting! Feel free to talk about it on your blog if you have one or comment here if you don't! Just post a link so people can find your blog.